You know how to pitch your tent in the dark and you can make a mean freeze-dried macaroni and cheese, but can you ford a raging river? Do you know where to find the most consistent source of food if you’re stuck in the woods without your pre-made meal? Can you build a tent from a garbage bag, navigate without a compass, or filter water…without a filter? Our top ten backpacking skills will keep you safe in just about any situation.
1. How to Hike… the Right Way
In recent years, masses of runners have come to realize that the padded shoes they’ve been wearing for decades have damaged the natural biomechanics of their running gait. Hikers are coming to the same realization about the boots and gear they wear.
“I hiked 6,000 miles in just a few years before [backpacking guru] Ray Jardine showed me I was walking wrong,” says Nate Olive, a former backpacking teacher at the University of Georgia who’s currently working as a personal backpacking consultant in Athens, Ga. “The shoes we wear, the gear, the high arch support; it all creates an unnatural posture and stride.”
Take Olive’s stride test: Start walking normally, then put your fingers in your ears. If you hear the thud of your steps, you’re walking wrong.
“That’s the sound of wasted energy traveling through your knees and feet into the ground,” Olive says. “Add that up over a thousand miles, and you’re burning extra calories and creating extra impact on your joints that could mean the difference between finishing a thru-hike and bailing early.”
Try taking off your shoes and walking barefoot. Notice that the impact is closer to the front of your foot. This is the stride you want to mimic with boots and pack on. Concentrate on landing on your forefoot, where the impact will be consumed by your body’s natural shock absorbers, as opposed to the typical heel strike, which causes the impact to travel up through your joints.
 2. How to Predict the Weather
Thunderstorms are a fixture in the Southern Appalachians, moving in quickly to surprise backpackers stuck in the wilderness without the convenience of live Doppler radar. Learn how to read the clouds while you’re backpacking, and you’ll know whether to head for cover or push on for extra miles.
Cirrus clouds: Thin and wispy clouds forming at the highest altitudes. If they’re stagnant, they indicate good weather for the next 24 hours. If they’re moving quickly, a change in weather is coming within the next 24 hours.
Cirrostratus clouds: Thin clouds that blanket the sky at a high elevation. They’re so thin, they give the sun a halo effect. Usually, these clouds indicate a storm within 12 to 24 hours. If they thicken, expect rain sooner. If lower elevation clouds are also present, the chance of rain increases.
Altostratus clouds: Gray clouds that cover the sky. Expect continuous rain before the end of the day.
Altocumulus clouds: White, gray, and patchy clouds forming at middle elevations. If they build and thicken, it means an afternoon thunderstorm is likely.
Stratus clouds: Low-lying clouds that cover the entire sky in a gray blanket. They carry a consistent drizzle, but usually no thunder or lightning.
Cumulonimbus clouds: Massive, low-lying thunderheads with a flat base and anvil top. At first, they may look like friendly cumulus clouds (white cottonballs) but watch for vertical growth. If these puffy clouds get taller and bigger, head for shelter.
3. How to Cross a Raging River

The key to crossing fast or deep water safely is patience.
“The smartest thing you can do is use a topo map to find the best place to cross a stream beforehand,” says Joe Moerschbacher, a professional adventure racer and guide who teaches a Southern Appalachian Mountaineering course in Western North Carolina. Look for a wider stretch of river—usually indicated by a thicker blue line on the map— that’s relatively straight. Avoid crossing the river in a deep bend because the inside of the bend will be calm and shallow while the outside will be deeper with faster water.
If you’re standing on the bank of a deep, fast river, walk upstream to a confluence where the volume of water will be divided between two branches. Use a stick to test the river’s depth, and never cross a fast-moving river that’s deep enough to get your torso wet.
Once you find a spot you feel is safe to cross, unbuckle the waist and sternum strap from your pack, so you can ditch it easily if you start swimming. Leave your boots on, but consider taking your socks off to keep them dry. Find a large, sturdy branch to give you a third point of balance, like a tripod. Face upstream, but keep your eyes on the bank you’re moving toward. Place the stick in the stream first, putting your weight on it, then bring your feet around one at a time. Move slowly, but consistently, never lingering in one spot for too long.
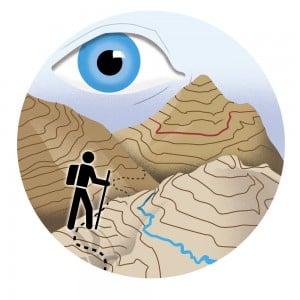
 4. How to Read a Topo Map
Everything you need to know about the terrain you’re planning to hike is detailed in a standard topographical map. But few people understand how to read the details of those maps properly.
“If you really know how to read a topo map, it becomes 3-D,” says Ronny Angell, director of the Odyssey Adventure Racing Camp and instructor of the popular Land Navigation Clinic series in Roanoke, Va. “You begin to see the features that are outlined on paper, and vice versa. You can look at a ridgeline and convert it in your head to topo.”
Understanding the following basic principles of topos will let you know if you’re going to be hiking peaks, ridges, valleys, where the water is, where your steepest climbs will be. More importantly, understanding the topo will keep you from getting lost without ever having to use a compass.
“Everything is a reference,” Angell says. “If your projected route takes you on a ridge, and you’re dropping elevation in real life, you know something’s wrong. If the map says you’re supposed to cross creeks, but you don’t, you know something’s wrong.”
 5. How to Make a Fire with Flint and Steel
Matches are great, but flint and steel are weatherproof. You can soak flint and steel in water for two weeks, and it will still spark. Being able to start a fire if you’re stuck in the woods in any condition is the one skill every hiker should know. A fire will dry wet clothes, hold off hypothermia, boil water (giardia is the gift that keeps on giving), signal for help, and lift your spirits. Striking steel against flint is arguably the most dependable way to start a fire in any weather conditions, even a downpour.
You’ll Need
Flint: Any piece of hard rock will do. Quartzite, common in the Southern Appalachians, works well.
Steel: You can buy pre-made strikers in the form of carbon steel rings, or you can use an old carbon-steel pocket knife. Stainless steel won’t work because it’s too hard to flake.
Tinder: If you think ahead, cotton balls soaked in petroleum jelly are easy, lightweight fire starters. If you’re in the woods without cotton balls, shave dry bark from a birch tree with your knife, or find dried grasses or moss. Wood shavings from a downed tree work (the smaller the shavings, the better). If you have chapstick in your pack, use it to coat parts of your tinder for a hotter flame.
Make Fire
[1] Pull one soaked cotton ball apart and place it on the ground (clean your fingers of any petroleum jelly).
[2] Hold the flint (rock) between your fingers with the sharpest edge facing out, above the cotton ball.
[3] With the steel in your other hand, strike the flint at an angle, creating a slow, downward scrape. If you’re using a pocket knife, keep the blade closed and strike the flint with the dull end of the knife. The flint is stronger than the steel, shaving little pieces of metal from the striker, and creating sparks, which land on the cotton ball.
The cotton ball should ignite quickly, creating an open flame. Build your fire by stacking increasingly bigger pieces of tinder on the flame.
 6. How to Find Potable Water
Drink from a stream or lake in the Southern Appalachians and you’re risking a bout of giardia. If you have the ability to build a fire, boiling water is still the best purification method. If you can’t build a fire, you need to find a springhead, which are actually more common than you’d think.
“Springheads are everywhere,” says Richard Cleveland of the Earth School, a self-reliance school in western North Carolina. “You just have to keep your eyes open.”
The easiest way to find a spring head is to follow a creek upstream, looking for smaller branches feeding into the creek. Look for the smallest feeder branch, then follow that upstream. Eventually, you will come to its source, where the water emerges from the ground. This is the springhead. The cleanest springs will emerge from vertical ground, either a stone face or earth.
Dry creek beds also lead to springheads. Follow the dry creek bed as high up the mountain as you can, then dig two or three feet down with a knife or sharp rock until you reach water. Wait a few minutes for the hole to fill with water, and you should have water clean enough to drink.
7. How to Hike Blister-Free
You could get bitten by a rattler or fall off a cliff and break your pelvis while backpacking, but by far the most common injury is the blister. Nothing ruins an epic multi-day trip like these annoying, hot sores brought on by friction.
Prevent them: Start with moisture-wicking socks, which will help reduce friction caused by moisture and heat. Well-fitted boots (no movement in the heel) are also key. Pre-tape hot spots, using Moleskin or Micropore. Duct tape will work in a pinch, but it doesn’t breathe. Some adventure racers have even started lubing their feet up with Hydropel or Body Glide, which are gooey substances that eliminate friction between your foot and the sock.
Treat them: As soon as you feel a hot spot forming, treat the blister with Moleskin or tape. If it’s a full-blown blister, lance the pocket with a sterilized needle (using alcohol or fire) and apply pressure to remove the liquid. Keep the outer skin attached, apply antibiotic ointment, cover with a bandage and wrap it with medical tape (or duct tape if you don’t have medical tape).
8. How to Reduce Your Chance of Injury

There are a million ways you can hurt yourself on a backpacking trip, but the contributing factor to most accidents are medical conditions that alter a hiker’s mental status, namely dehydration, malnutrition, exhaustion, heat stroke, and hypothermia.
“When hikers are suffering from a condition like dehydration, they begin to make bad judgment calls and show poor coordination,” says Christopher Tate, head instructor at the Wilderness Safety Council in Alexandria, Va. “They show poor judgment about where to place their feet, and that results in a fall.”
Hypothermia is arguably the most dangerous of these afflictions, and often the easiest to overlook. If you’re soaking wet from a thunderstorm, even temperatures in the 60s can induce hypothermia. If your body temperature drops even two or three degrees, you’ll start having greater difficulty doing the simplest things and thinking rationally.
Diagnose it: It’s tough to self-diagnose hypothermia, but pay attention to your fine motor skills. Are you having trouble tying your shoes or working your backpack’s zippers? That’s a sign you’re becoming hypothermic.
Treat it: Building a fire is the fastest way to stay warm, but what should you do if you can’t get a blaze going?
“If you’re soaking wet, leave your clothes on, but stuff a layer of leaves between your clothes and your body,” says Richard Cleveland, director of the Earth School. The leaves stuffed into your shirt and pants will create an insulating layer that separates your body from the wet clothing while bringing your temperature back to normal.”
 9. How to Bear-Proof Your Campsite
Bears are curious animals, and there’s no way to guarantee one won’t come strolling through your camp. But you can take smart measures to reduce the chance of a late-night ursine visit.
Divide your camp into four distinct areas: sleeping quarters, food storage, cooking area, washing area.
Set up your tent upwind, ideally 200 feet from the other three areas. The idea is to separate yourself from the odors that might attract a hungry bear. Never cook or wash your dishes where you sleep, and clean up immediately after cooking, burning food scraps and bagging any trash that can’t be burned. Also, wash your hands and face before you sleep to eliminate lingering food odors.
Most importantly, hang your food. Pack 60 feet of rope, a few carabiners, and two stuff sacks to make things easy. Black bears have been known to chew through rope to get at hanging bags, so the Forest Service recommends using the “counterbalance method” of bear bagging. Place all your food in one stuff sack, and your garbage in another, tying each bag to opposite ends of the rope. Make sure both bags weigh the same. Throw the trash bag over a sturdy branch so it hangs well off the ground. Use a long stick to push the food bag in the air, which will drop the trash bag closer to the ground, until both bags are at an equal height.
You want both of the bags to hang 12 feet off the ground, 10 feet away from the base of the tree, and 5 feet below the branch to ensure clearance from any stretching, climbing, or jumping bear.
10. How to navigate without a compass
You can use a watch face (one with hands) and the sun to establish basic directions. Hold the watch horizontally, and point the hour hand in the direction of the sun. Bisect the angle between the hour hand and noon and draw an imaginary line. That line is pointing due south. This is a rough method that will give you a general sense of north and south, but there’s a margin of error of up to 20 degrees. If daylight savings is in effect, subtract an hour from your current time.
 Lost and Found: What to Do When You’re Lost in the Woods
Most survival situations in the Southern Appalachians are less than 24 hours long, so you probably won’t need to know how to build an igloo or skin a moose for its pelt. Still, there are a few key skills that will keep you safe when you’re lost and help rescue workers find you if a search is necessary.
Surviving in the woods starts with being smart before you leave the house. First, leave a written account of your planned hike, including the trailhead where you’ll park, the trail you’ll hike, and when you expect to be back. Second, pack for trouble. There are three things you should have on you before you enter the wilderness, even if you’re only going for an hour-long day hike.
[1] Fire starters (matches, tinder, flint + steel)
[2] Two large trash bags
[3] Bouillon cubes
These three lightweight items will allow you to build a shelter, start a fire, boil water, and eat dinner. If you do get lost and it’s getting dark, stop walking. “Build a camp with whatever you have and wait it out,” says Tim MacWelch, owner of Earth Connection School, a wilderness survival school. “The Southern Appalachians are fairly populated, so if you stay put long enough, you will likely get found.”
In addition, you’ll eventually need to consider how to get the four essentials to survival: water, food, heat, and shelter.
WATER
If you can’t find a springhead, you’ll need to boil water. First, build a bowl. Find a medium-sized log and burn out the center of it over a fire. After it’s charred, scrape away the layer of burned wood with your knife, shaping the center of the log into a bowl. Next, place several small rocks in your fire. While you’re waiting for the rocks to get hot, fill your log bowl with water from a creek. After the stones are hot, use two sticks like chopsticks to remove them from the fire and place them in the bowl of water. A few hot rocks should bring the water to a boil quickly. Let it boil for a few minutes, remove the rocks, and after the water cools, it should be safe to drink.
FOOD
Unless you’re proficient in identifying edible plants, it’s not recommended that you forage for food.
“There’s too much stuff out there that could hurt you,” says Reggie Bennett, a former Air Force survival instructor and owner of the Mountain Shepherd Wilderness Survival School in Catawba, Virginia. “More importantly, you’re going to expend more calories looking for edible plants than you’ll get from those plants.”
Instead of plants, eat bugs.
“There’s more nutritional value in one ounce of termite than in one ounce of steak,” Bennett says.
Three Rules for Eating Bugs
[1] Only eat bugs with six legs or fewer (no spiders or centipedes).
[2] Eat the bugs that hide from you. Beetles, ants, termites, crickets, worms, and grubs in trees—they’re all safe to eat and they’ll give you plenty of caloric value.
[3] Deadfall is your friend. Turn over a downed log and you’re likely to find a host of bugs that are safe to eat. You might even find a snake, which Bennett says tastes like chicken.
SHELTER
Your first order of business when lost isn’t building a fire, it’s building a shelter. “Most people don’t understand the priorities when they enter the wilderness. They might take food and water, but they don’t understand how important a shelter is,” says Bennett, adding that a proper shelter can keep you warm in the absence of a fire, while protecting you from the elements. “If you can get a shelter up, then start a fire, you’re going to get rescued.”
If you packed trash bags, follow these instructions for building a tube tent.
The Trash Bag Tube Tent
Contractor bags (55 gallon) work best, but household garbage bags work in a pinch.
[1] Slice the bottom seam of each bag.
[2] Run a stick (or string if you have it) long ways through both bags
[3] Brace the stick between the low-hanging branches of two trees. You want the branches to be low enough to the ground so the bottom of the bag creates a flat surface on the ground.
The tube tent is open on both ends so you don’t suffocate, but surrounds you everywhere else, trapping your body heat and keeping the elements at bay. For extra insulation, stuff the tube with leaves.
If you’re stuck in the woods without a trash bag, build a debris hut. “This is the only natural shelter that will keep you warm without a fire,” says Richard Cleveland of the Earth School. “You’ll probably be uncomfortable, but you’ll make it to morning, and that’s what’s important.”
The Debris Hut
Find a sturdy ridge pole about 12 feet long. Latch one end to the side of a tree, or rest it between the fork of a low-hanging branch and the tree, or on a fallen tree or exposed small boulder. Taper the other end to the ground. Then place sticks on both sides of the pole, like ribs. Stuff the structure with leaves, packing each layer of leaves down as you fill. Then pack the outside with leaves, moss, bark—whatever you can find. When you’re finished, you should basically have a large, debris sleeping bag.
FIRE
If you’re not practiced in the art of building a friction fire (rubbing sticks together), forget trying to build one in the woods during a survival situation. Flint-and-steel-ignited fires are the most beginner-friendly survival fire you can build. Always carry a small pocketknife with you. You can find a rock to use as the flint, and tinder can be shaved from a tree, but you have to bring the steel with you in order to build a fire. •


