Being an outdoor enthusiast inevitably lends itself to plenty of moments when sh*t hits the fan. We’ve consulted a panel of four of the region’s wilderness medicine experts with 12 real-life scenarios so you can prepare for the worst and hope for the best on your next adventure.
OUR SURVIVAL EXPERTS…
are wilderness medicine ninjas well versed in the ways of Mother Nature’s capriciousness. They are climbers, paddlers, surfers, outdoor enthusiasts of every type who know firsthand what can go wrong when you’re recreating outside.
David Fifer
Owner, Red River Adventure Medical, LLC | Coordinator, Red River Gorge Special Treatment, Access, and Rescue Team | Lecturer, Emergency Medical Care, Eastern Kentucky University
Originally from Roanoke, Va., Fifer has served in the emergency medical services field for 15 years. His love of climbing landed him in eastern Kentucky, where he now serves wilderness rescue needs in the Red River Gorge and Natural Bridge State Park.
Karsten Delap
Owner and Head of Alpine Programs | Fox Mountain Guides
Wilderness EMT | AMGA Certified Rock and Alpine Guide Instructor |High Angle, Technical, and Wilderness Rescue, National Park Service | Volunteer, Brevard Rescue Team and Henderson County Rescue Squad
When Delap’s not guiding clients on climbs, he’s rescuing climbers from some of the very places he guides. Delap’s resume is chock full of high-altitude summits of some of the most revered mountains in the world, but his most important work is often done right here in the Blue Ridge near his western North Carolina home.
Mairi Padgett
Administrative Director, Landmark Learning | Instructor, National Outdoor Leadership School Wilderness Medicine
In 1996, Mairi and her husband Justin founded Landmark Learning out of their apartment. Now, 21 years later, the Padgetts oversee the nation’s leading institution for education and training in the outdoor community, the first outdoor school in the country to receive a national education accreditation.
Seth Collings Hawkins
Assistant Professor of Emergency Medicine, Wake Forest University | Medical Director, Burke County EMS & Burke County Communications | Medical Director, North Carolina State Parks |Chief, Appalachian Mountain Rescue Team
For over 20 years, Hawkins has made out-of-hospital, in-field medical care his specialty. He’s founded numerous organizations, including the Appalachian Center for Wilderness Medicine and the Carolina Wilderness EMS Externship, and is the lead author for the upcoming climbing medicine and wilderness first aid handbook Vertical Aid (available April 2017).
Scenario 1, Excessive Bleeding
The Scene: It’s a quiet afternoon near Kentucky’s Red River Gorge, or so it seems. David Fifer and a teammate pull their response vehicle into the parking lot of a local business, owned by other team members, just to check in. Minutes later, a vehicle grinds to a halt outside. From behind the driver’s seat, out stumbles a man completely covered in blood.
“It looked like something out of The Walking Dead,” Fifer remembers. “He was stumbling toward us and had an avulsion from the knee down to the ankle. It was just a massive slab of skin hanging off.”
The gentleman confessed to having gone on a “spiritual journey” in the gorge, a saga that entailed fasting for multiple days and bushwhacking with a machete. Somehow, the man had managed to, in effect, filet the lower half of his leg, which was still bleeding uncontrollably. To his credit, the man had attempted to fashion a tourniquet by shredding his pants into long strips of fabric, but the material was too delicate and the strips were hardly wide enough to make a difference. Recognizing this, the man painfully found his way back to his vehicle and started driving. Coming upon Fifer’s idle response vehicle was just a stroke of good luck.
“He was about to lose consciousness,” Fifer says of the patient. “The big mistake he made was that the material he was using was just too thin. He had probably already lost so much blood in the first place that he wasn’t really able to focus.”
With two other team members, the crew was able to stem the bleeding through direct pressure and without the use of a commercial tourniquet.
What not to do:
• Bushwhack with a machete, solo, while fasting
• Underestimate blood loss—“You can lose a lot of blood over time from even a small wound, and it can be really hard to estimate blood loss since blood can get soaked into soil or leaves or clothing,” says Fifer. “The wound site itself can be deceptive. It’s hard to go wrong about being aggressive with bleeding in the first place. When it comes to controlling bleeding, go big or go home out of the gate. You can’t replace blood if you lose it in the field—the only way to replace blood is through a transfusion.”
What to do:
• Fashion a tourniquet, early. “Although direct pressure to the wound will control the bleeding in most cases,” says Fifer, “it makes sense to go straight to a tourniquet for any wounds to arms or legs that are bleeding significantly.” Tourniquets can be removed later if deemed too aggressive, but blood can’t be replaced, especially when you’re in the backcountry.
• To create a makeshift tourniquet, use materials that are “fairly robust,” such as tubular webbing or nylon rain shells. The fabric should be at least two to three inches wide. “You don’t want something that is going to stretch or tear easily,” Fifer adds, but the material should still be thin enough to twist tightly.
• Situate the tourniquet above the wound but not near a joint or too close to the injury site. “Think high and tight.” Find something to act as the windlass, or twisting mechanism, such as a carabiner, tie a square knot over the mechanism, and twist until the hemorrhaging stops and the pulse farthest from the injury is gone. Secure the windlass device so it doesn’t untwist. A tourniquet can stay on safely for at least two hours.
• Keep patient warm.
• Inspect tourniquet often for loosening.
Scenario 2, Hypothermia
The Scene: Fifer and a friend are hiking in the Shenandoah National Park to Marys Rock. The backpacking trip itself isn’t necessarily trying, physically at least, but it’s early March and the nights are still cold. The two arrive at camp, set up their tent, and settle in for the night, at which point, Fifer starts to shiver.
“I was not wearing appropriate layers at all,” he says. “My companion was reporting that I was really lethargic, not clear in my thoughts, slurring my speech,” all of which, he says, are signs suggesting mild hypothermia, if not moderate.
His friend acted quickly, insulating Fifer with extra layers inside his sleeping bag and fixing up a hot bowl of ramen to get his metabolism working again.
What not to do:
• Suck it up—“Some people get in this mindset where they say, ‘It’s cold, so I should be cold,’ but if you layer effectively, that should keep you from experiencing that cold.”
• Strip down and cozy up in an attempt to transfer body heat. Though there is some research that suggests this approach can be effective, it should be used as a last resort, as it increases the risk of another individual succumbing to hypothermia. “If you’re running low on options, you’re low on calorie-dense food, having trouble starting a fire, don’t have a way to heat liquids, and can bundle up with your companion in a way that won’t make you hypothermic, why not?” says Fifer. “But I’d probably need to not have options A thru D before trying some body heat transference.”
What to do:
• Shed any wet layers from the patient and add dry ones.
• Prevent moisture from reaching the patient.
• Add a heat source, like heat packs or a warm water bottle inside the sleeping bag, to increase patient’s heat production.
• If patient is able to chew and swallow safely, make high-calorie food to spur metabolism. Warm liquids can make a patient feel comforted, “which is not for nothing. Psychological first aid is real,” says Fifer.
• Create a hypo wrap by insulating the patient and wrapping them in a cocoon using an outer moisture barrier, like a rain fly.
• If patient is severely hypothermic (think cold to the touch, pale, altered mental status, stopped shivering), handle the patient as gently as possible because aggressive motion can cause them to go into cardiac arrest.
Scenario 3, Snakebite
The Scene: Fifer is scrambling up a hill to set up a rappel, using his hands to stay balanced. Too late to do any good, he notices a copperhead right beside his hand. Surprisingly it doesn’t strike.
“Copperheads in particular are actually pretty docile. For the most part, they’re not looking to tangle,” he says, “unless you really make that snake feel threatened.”
That’s not to say that climbers and hikers in the gorge aren’t getting bit by snakes. In fact, a friend of Fifer’s recently spent a couple of weeks in the hospital after being bitten by a copperhead. But even then, he says, about 30 percent of all snakebites from the Crotalus genus (copperheads and rattlesnakes) are “dry bites,” where no envenomation occurs. For the remaining 70 percent of bites that do contain venom, the mortality rates are relatively low, about a dozen or less per year, and typically occur in people who either have certain underlying health conditions or are very old or very young. That’s not to say that snakebites in the backcountry should be taken lightly.
“Puncture wounds, by definition, are pretty deep and they really do lend themselves to infection,” says Fifer. “Moreover, Crotalus envenomations can cause serious tissue damage if not treated.”
What not to do:
• Use a tourniquet. Snakebites won’t produce that much blood, and you don’t want to concentrate the venom in one area.
• Panic. Snakebites can be treated successfully, even if you are in the backcountry.
What to do:
• Wash the wound if you can with drinkable water. Puncture wounds are ideal breeding grounds for infection.
• Splint and dress the bite as if it were a strain or break, using the “rule of thumb,” for dressings. “You want to be able to slip your thumb underneath the dressing, not too tight,” Fifer says.
• Monitor the dressing frequently, as bite site will likely swell. Remove shoes, socks, jewelry, anything near the bite site that could constrict the blood flow in the event of excessive swelling.
• Evacuate the victim and get to the hospital immediately for antivenin.
Scenario 4, Altitude Sickness
The Scene: Delap and a fellow guide are in the middle of a trip in the Sierras. Their clients are settling in at camp, preparing for the next day’s summit of Mount Whitney, when two climbers come down the mountain with bad news—a woman is unconscious on the saddle of Mount Whitney around 14,000 feet. Delap, who has worked in the emergency medical field for over a decade, sets out with a fellow guide.
“She was basically dead,” Delap remembers. “It was dark, she had not made it to the top, and was literally laying up there to die.”
When Delap and his partner reach the woman, she is unresponsive. They begin the slow and trying task of taking her down the mountain. When they get 1,500 feet below the saddle, she comes to, enough so that she can even walk on her own, albeit not very gracefully. Another 1,000 feet down and she improves even more to the point that Delap and the other guide don’t have to fully support her. But around 10,500 feet, the woman becomes combative. Instead of expressing gratitude to her rescuers, she refuses any further assistance. All of these developments, says Delap, are telltale signs of altitude sickness.
“I’ve seen this before in people where you bring them down and they’re like, ‘Oh I’m fine, I’ll go back up,’ and you have to say ,‘No you’re not fine,’” says Delap. “They’re fine now because they have oxygen in their head, but with altitude sickness, people don’t understand that.”
What not to do:
• Summit solo.
• Ignore proper acclimatization. Above 8,000 feet, the Altitude Research Center recommends sleeping altitude should not increase more than 2,000 feet per day, and that climbers should take one rest day with no elevation change for every 4,000 feet of gain.
• Ignore the signs of altitude sickness, in yourself, in your group, or in passing climbers—“If you see someone sleeping on the side of the trail at higher altitudes, or stumbling and falling around, ask them how they’re doing,” says Delap. “If they’re not giving you clear answers, encourage them to come down but be forewarned: they could be combative.” Signs of acute mountain sickness include headache, fatigue, dizziness, nausea, trouble sleeping, and poor decision-making. “It’s like being in a state of drunkenness without any of the good feeling and all of the bad decisions.”
What to do:
• Descend immediately. It can take as little as 1,000 feet of elevation loss to improve conditions in a patient with altitude sickness.
• In severe cases of altitude sickness, known as high altitude pulmonary edema (HAPE), breathing supplemental oxygen is recommended.
Scenario 5, Waterfall Accident
The Scene: It’s late in November 2016 and a 23-year-old man from Florida is with his friends visiting Moore Cove Falls in the Pisgah National Forest just outside of Brevard, N.C. Feeling bold, the man begins scrambling up the side of the 50-foot waterfall to the top. Suddenly he falls, at first just 10 feet. He lands on a ledge, but moments later, his lifeless body slides over the lip to the waterfall’s base.
“By the time we got the call out, got to the trailhead, and hiked in, we’re basically looking at an hour since the accident time,” Delap, who was one of the rescuers, says. “If he had been on the doorstep of the hospital, the likelihood [of survival] still would have been pretty slim.”
The man did not survive the attempted resuscitations. His death marked the eighth waterfall-related death in 2016 for Transylvania County, an area well known and beloved for its many waterfalls. Delap says the problem with tourists around waterfalls is that they misjudge their risk management.
“If he’d had a helmet on, he could possibly be alive, but people probably aren’t going to hike around a waterfall with a helmet on,” he says. “But the rocks are almost more slick than ice, because ice will melt and can freeze to your boot.”
What not to do:
• Ignore the warning signs near waterfalls.
• In the event someone does ignore the warning signs, slips, and falls, do not make yourself a patient, too. “That’s happened a couple times this year. If you can’t hear them, can’t see them, can’t easily get to them, just call for help or go get help,” Delap says. “It sounds horrible to leave them, but if you rush in there and get hurt, too, that makes it twice as hard on the rescuers.”
What to do:
• If you’ve determined it’s safe to get the victim, remove them from the water so they are not drowning or getting cold. Assess airway, breathing, and circulation, performing CPR when necessary.
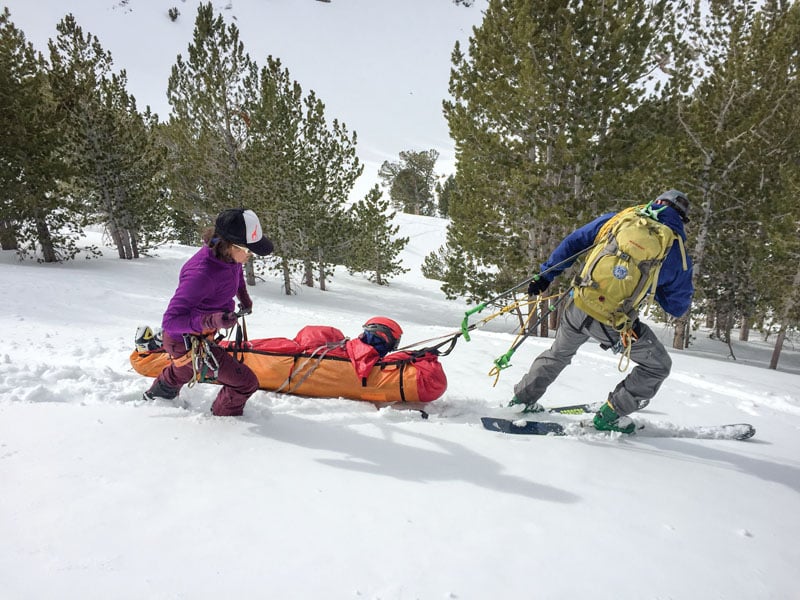
• If there is not a head injury, assume there is a spinal injury. Situate them in a position of comfort, “whatever that means for them,” says Delap. “We’re moving past the spinal immobilization devices. If they’re comfortable, their spine is probably not going to move, especially if it’s hurt.”
• Remove wet layers, replace with dry clothes and other insulating materials, and treat patient for hypothermia, even in warm weather.
Scenario 6, Lower Leg Injury
The Scene: On a hot summer day at Looking Glass Rock near Brevard, N.C., a young man is out with his girlfriend climbing on the South Side. The man, who had taken a college course on rock climbing, isn’t the most experienced climber, but he knows some basic safety precautions. After scrambling to the top and setting up his anchor, he ties a BHK, or big honking knot, and prepares to rappel. Unbeknownst to him, he ties a slipknot instead, not a BHK, and he doesn’t back it up. When he leans back in his harness to begin the rappel, the slipknot fails, sending him over 60 feet to the ground.
“He landed on both feet resulting in a bilateral open tib-fib fracture,” says Delap, who was one of 23 rescue and EMS personnel on site. “Both bones in his lower legs were sticking out, and because of the way Looking Glass is, when he fell, his hands were scraping the rock on the way down. His hands were useless. They were down to the bone.”
That, on top of the already debilitating lower leg injuries, meant the man was entirely at the mercy of the climbers at the crag. Fortunately for him, two of those climbers happened to be Wilderness First Responders (WFRs). They made the call for help, gave the young man some water and kept him calm, took note of his allergies and medical history, and one of the WFRs even hiked to the trailhead to meet Delap. The whole rescue, from the time of the call to the time the young man was headed to a hospital, took just under four hours.
What not to do:
• Go climbing without proper training or a partner who is more knowledgeable.
What to do:
• Stop bleeding through use of elevation, direct pressure, or tourniquet if hemorrhaging is severe. •Get patient in a position of comfort, being sure to protect the spine but not make it rigid.
• Clean the wound with drinkable water. If patient is going into shock, this may not be the highest priority.
• Fashion a splint, either with a SAM splint or something equally rigid like trekking poles or reasonably sized tree limbs. Even an empty pack could work in an emergency. If something rigid is not available, use plenty of layers and create bulk for stability. Fill layers and material around injury and wrap.
Scenario 7, Lightning
The Scene: An outdoor instructor is leading a course with his students at Table Rock in western North Carolina. Thunder rumbles in the distance. The instructor wisely splits up his group to reduce the potential for multiple victims in the event of a lightning strike. His students are well into their course by now, and take up the crouched lightning position in the parking lot.
Suddenly, there’s a loud BOOM. The instructor is blasted to the ground. His students scramble to get him to safety and check his pulse. There is none. Fortunately for the instructor, he had taught CPR earlier that week. The students started performing CPR immediately and resuscitated him on the spot.
“The reason it was so effective was that the heart that was stopped by the great defibrillator in the sky was a healthy heart,” says Padgett. “With CPR, his heart was able to start itself again,” and the instructor recovered just fine.
Padgett herself has been stuck high on ridgelines when storms roll in. She says that especially in North Carolina, a state that had the second highest number of lightning-related casualties between the years 1959-2007, afternoon storms should seriously factor into how and when a person decides to recreate.
“We encourage the groups we teach to make sure they summit early in the day because lightning storms are most common between 1 and 5 p.m.”
What not to do:
• Ignore thunder. The National Oceanic and Atmospheric Administration suggests, “When thunder roars, go indoors!”
• Camp on mossy balds or low-lying, treeless fields.
• Assume your tent will protect you.
• Take shelter beneath lone, tall objects, such as trees.
What to do:
• Take shelter in forests with many similar medium-sized trees. “Imagine an apple orchard,” says Padgett. These also make safer campsites.
• Begin seeking shelter and start descending at the first signs of a storm. Camp in areas where you are not the lowest or tallest point around.
• If you’re paddling on the river and stuck in a storm, keep going. “Generally speaking, the fact that you’re on the water and moving downstream to your extrication point, probably the safer thing to do is keep on going,” says Padgett, though different river companies may have different policies.
• If you are near your car, take shelter inside, but be sure to move it to a safer location first. “If you can’t avoid lightning, a vehicle is better than no shelter,” Padgett says. “The car could still get struck, so descend and get to a safer place with your vehicle rather than rely on it to protect you.”
• Spread group out within earshot of each other and assume the lightning position, crouched down, hunched over, as small as you can make yourself.
• If someone is struck by lightning, attempt to move them away from the site. “Lightning does like to strike in the same place twice,” says Padgett. “Check the scene for safety and drag or move the victim to a safer spot.”
• Once the storm passes, continue descending if up high or seek better shelter. Storms in the Southeast in particular tend to cycle back around.
Scenario 8, Lost
The Scene: Padgett is in her early 20s. She’s working for a veterinarian, a man she has come to respect and admire. Her boss takes a vacation to Standing Indian Mountain with his family. While they settle into the campground, Padgett’s boss goes for a hike. The trail is a loop, so he doesn’t think to bring a map or much in the way of supplies. But soon, he starts to worry—is he going the right direction? How much further does he have? Daylight starts to fade and his family, worried, calls 911.
“The whole rescue squad came out,” says Padgett, who was relayed the story on the following day. “It took a long time to find him, but he was right there. He was still on the trail!”
Short of suffering a moderate case of embarrassment, Padgett’s boss was just fine and reunited with his family shortly after. Getting lost, says Padgett, is a real problem for outdoor enthusiasts, even if you are in an area considered well traveled and developed.
“That scenario really illustrated to me that folks who go into areas that are created for recreators with trail signs and beautiful walkways, if they’re not prepared, they can get lost in places we don’t consider easy to get lost in,” says Padgett.
What not to do:
• Forgo planning or map familiarity.
• Continue wandering. Just stay put.
• Leave designated trails. “Our mountains have so many nooks and hollers and are quite steep and full of nearly impenetrable thickets,” says Padgett. Theories like following water downhill or hiking in concentric circles can not only lead to increased fatigue and disorientation but can also move you farther away from help.
• Rely on your cell phone. “Although I’ve witnessed the accessibility of cell towers skyrocket in our region in the last 20 years, you still cannot get a signal in a lot of areas. Part of your pre-trip planning is knowing where cell service can be accessed along your route.”
What to do:
• Plan ahead and prepare. “Know where you are going, know your physical limitations…and be fully prepared with shelter, food, and water.”
• Tell friends or family where you’re going and when you are expected back.
• Have a map and compass and know how to use them.
• Bring food and water, or a means of filtering water, always.
• Have a buddy, especially if you are an inexperienced hiker.
Scenario 9, Bear Scare
The Scene: Brian Sarfino of Tucker County, W.Va., is embracing the simple life outside of South Lake Tahoe in California. His home for the summer of 2003 is nothing more than a backpacking tent and a 10’ x 10’ mesh canopy that acts as his kitchen. He’s been camping out at one particular site in the forest for, he admits, longer than the two-week time limit, but there’s no one else around and, being from the rural mountains of West Virginia, Sarfino feels right at home in the woods. Comfortable. Complacent, even.
“I had definitely pushed my luck and gotten lazy with my food care and storage,” Sarfino says. “I just stored my food in the [kitchen] tent.”
One morning, Sarfino wakes to the sound of heavy breathing. A muzzle nudges his one-man tent. Then, he hears what he’s been dreading—the shredding of claw-on-mesh, and the subsequent ransack of his kitchen.
“That’s when I knew there were multiple bears,” Sarfino says. “I could feel the vibration in the ground when the momma bear would come down from her hind legs. Everyone was getting really excited, or aggressive, I couldn’t tell which.”
Now, Sarfino’s sleeping tent isn’t the recommended 100 yards away from his cooking area. No, Sarfino is lying on his mat a mere five feet from the bears’ plundering. As one bear after another charges past with their loot in tow, Sarfino can practically feel the fur brushing past.
“I thought they were going to run right through my tent or try to get into my tent,” he says. “I didn’t know what was going to happen.”
Escape for Sarfino is not an option. The bears are all around his campsite, and his truck is too far to comfortably reach. Seeing no other option, he rolls onto his stomach, assumes the “play dead” position with his hands over the back of his neck, and waits for three painstaking hours. Fortunately, the bears moved on, satisfied with their night’s feast.
What not to do:
• Leave your trash and/or food near your tent.
• Leave a messy kitchen.
• Turn and run in the event of a bear encounter. “They will chase you, and they are faster than we are,” says Padgett.
What to do:
• Hang food at least 100 yards from where you’re sleeping. “Also, identify where you’re going to do this hang before it gets dark,” adds Padgett. “Setting up a bear bag in the dark is very hard to do and causes people to do a very poor job.”
• Cook at least 100 yards away from your tent.
• Hang your food at least 12 feet off the ground, five feet away from the tree trunk, and five feet below the branch holding it.
• When traveling solo or in small groups, make noise or bring bells in bear country to prevent the element of surprise.
• Travel with bear pepper spray on you or quickly accessible.
• Should you encounter a bear, face them, slowly back away, quietly. If the bear continues to approach you, make yourself physically look as big as possible and make a lot of noise. Get close to others if you’re in a group and clap and yell while backing away. “You can even hold backpacks over your head. We want them to want to avoid us.”
• In the event of a bear attack, follow the National Park Service guidelines. For brown or grizzly bears, play dead by lying flat on your stomach with your hands clasped behind your neck and spreading your legs to prevent the bear from easily turning you over. For black bears, do not play dead. Fight back if a car or some similar form of shelter is not available. Use whatever weapon is available and direct kicks and punches toward the bear’s face.
Scenario 10, Burns
The Scene: Hawkins is leading a sea-kayaking trip in the Florida Everglades for the Yale Outing Club: clear coastal waters, sandy beaches, breathtaking sunrises and sunsets. The trip is stacked up to be a memorable one, until one of the participants gets sunburn.
“Sometimes we dismiss sunburns as not very important, but this participant got such bad sunburn that his ears and nose were blistered and he was in so much pain,” Hawkins says.
Serious burns, whether from the sun or otherwise, can be seriously painful. More recently, Hawkins’ colleagues answered a call for a woman who spilled boiling water in her lap as she was removing a pot from her camp stove.
“The two things we see most often are burns from stoves exploding or boiling water dropped in people’s laps or kicked over from kids running around the campsite,” says Hawkins. “Usually people don’t have medical kits that have sufficient pain medicines to treat that level of pain.”
What not to do:
• Try to get a tan in the backcountry.
• Underestimate anything hot. “A lot of times people get contact burns from trying to flip grills off campfires because they think they can just do it quickly.”
• Sit down while you are cooking. “Be mobile and be on your feet in case of a spill,” says Hawkins.
• Apply snow or ice directly to the burn site. “You can cause more damage to the skin tissue if it’s too dramatic of a cooling measure.”
What to do:
• Establish a “no-run” zone while cooking.
• Keep stoves clean and in proper working condition.
• Place bowls or thermoses on ground (as opposed to holding them) when pouring hot water.
• Submerge burn in cool water or use cool, wet cloth to soothe burn.
• Apply burn cream or, if not available, antibiotic ointment.
• Wrap in dry dressing for extensive burns.
Scenario 11, Fish Hooked
The Scene: Hawkins and his family are on vacation in the Outer Banks. Hawkins is out in the surf trying to squeeze in a few more waves before the day is done. Out of sight and farther up the beach is a man illegally surf fishing with a long line, but when Hawkins feels a sharp pain in his right big toe, he first suspects a crab, not a fish hook.
“I pulled my leg up and it took me awhile to figure it out, but it was a sea fishing fish hook that had gone through my toe. The line had hog tied me around my ankles, so I lost the use of my legs in the surf.”
Hawkins frantically waves his arms, helplessly flailing without the use of his legs. A passerby sees Hawkins in distress and gets him to shore. Hawkins successfully depresses the barb to the point where he can edge the hook out of his toe, an uncomfortable but fairly straightforward procedure most anyone can replicate.
What not to do:
• Panic.
• Yank fish hook out of the track it has already created.
What to do:
• Remove line and anything else attached to fish hook.
• Disengage barb and slide out backwards, or rotate barb forward to complete its path so it exits the skin. Cut off the barb and then rotate backwards through its track.
• Clean puncture wound with the cleanest available water and mild soap if available.
• With fish hooks that have the possibility of transmitting tetanus or animal bacteria, seek medical treatment immediately.
Scenario 12, Drowning
The Scene: The Catawba River is flooding. Law enforcement and rescue personnel in Morganton, N.C., are working around the clock to ensure the city’s safety. Despite their warnings, a group of young teenagers decides to hit the water in recreational kayaks. One of the boys hits a low-head dam where the river passes through town. His kayak flips and washes downstream, but his body recirculates in the feature.
“By all definitions of the word, this kid drowned,” says Hawkins. “He was pulled out of the water, without a pulse and not breathing, by his friends who did not know CPR.”
But what they lacked in medical training, the boy’s friends made up for by placing a call to the Burke County dispatch center, which employs Emergency Medical Dispatchers specifically certified by the state to practice medicine over the phone.
“They can train lay public to do CPR over the phone and in real time, that’s what they did,” says Hawkins. “They taught this guy’s friends how to do CPR and he recovered.”
What not to do:
• Delay CPR.
What to do:
• Clear out airway obstructions. “Almost invariably people who have drowned have a lot of foam that comes out of their lungs,” says Hawkins. “That’s creepy for people to see, so they spend a lot of time trying to clear this foam, but that can be breathed back into the patient with no complications during emergency ventilations.” Obstructions here can be things like river matter or vomit.
• Check for pulse.
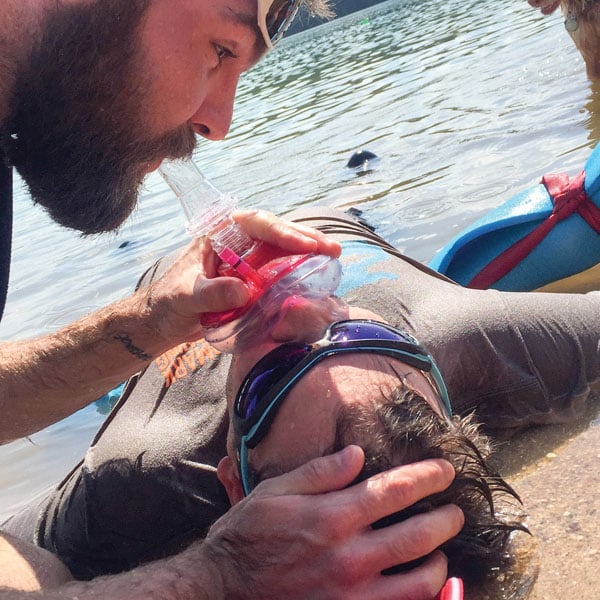
• Begin rescue breathing immediately. “Now with CPR they are teaching people to look at compressions as really important, but especially in very young kids and drowning patients, it’s the breathing that’s really important. It’s a lung problem, not a heart problem.”
• Once the patient establishes breathing on their own, turn them on their side, lying on one shoulder, and place them in the recovery position. “They almost always vomit. If they’re lying on their back and that happens, they can swallow that vomit and get into serious trouble.”
• Keep patient warm.
